RDS as tabs

APEX quickie: set region display selector dynamically

A region display selector (RDS) can be configured so that it remembers the last selected region or tab. However sometimes we might want to navigate from another page directly to a specific tab no matter what the last remembered session state was. 

Here is how to do that.

My example uses a region display selector set to “View single region” and three color coded regions. The template options are choosen in such a way, that the regions are displayed directly below the selector, with no additional margin.

The region display selector (RDS) uses the session storage of the browser to remember the active tab. This can be investigated using the browsers developer tools.
Find web-storage, navigate to the Session Storage and look at the keys.

The Key here is using a prefix that consists of three parts. The application id (in my case 87230) the page number (2) and the region static id (DEMO). The name of the key is “activeTab”.  So the full name of the key is .87230.2.DEMO.activeTab

We can read and set the local storage and the session storage using APEX javascript apis. Link to the docs

The following code can read the session storage for the current page and will set a key to a specific value.

let sesStorage = apex.storage.getScopedSessionStorage({
       useAppId:true, 
       usePageId:true});
sesStorage.setItem( "DEMO.activeTab", "#REGION3" );

Typically we want to set the target tab from inside a different page. Set the target display selector, then navigate to that target page. This is the more logical thing to do, otherwise we could simply click on the link or sent this click event to the appropriate item. 

// choose target region via region display selector
// static id = "REGION3"
$('#REGION3_tab a').trigger('click');
If we are currently on a different page, we need to construct the prefix for the key by ourself. That is why the following code sets usePageId to false. It would be possible to read the session state for the whole application, but I prefere to read only the needed parts. So we construct the key prefix by ourself and this includes the appId.

let sesStorage = apex.storage.getScopedSessionStorage({
       prefix:"."+&APP_ID.+".2", 
       useAppId:false, 
       usePageId:false});
sesStorage.setItem( "DEMO.activeTab", "#REGION3" );
I tested this useing a static select list with a dynamic action that essentially run this code. And the result is as expected. The 3rd region is selected. Also the developer tools show that the value was changed. rds_result 
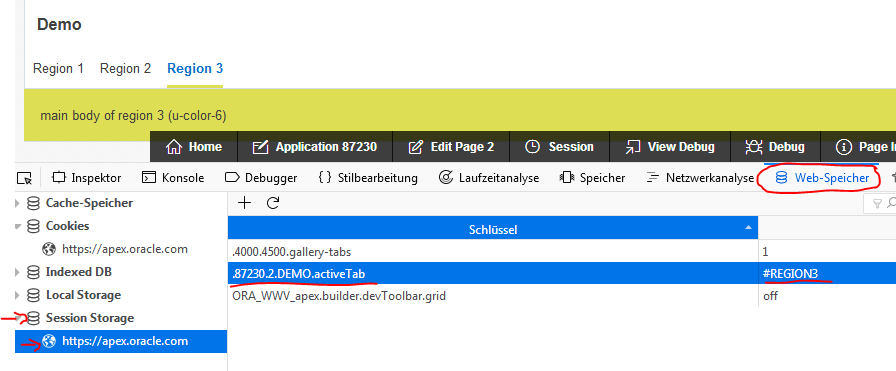
Fairly easy, once we know what to do. In the future I might use this session storage for other things too.

Apex 5 – show Y/N columns as font awesome icons

apex5_YN_icons

The database column value is Y or N (J or N for German databases). In the past I rendered such columns using images that had a name, where the column value could be appended to, for example IconCheckbox_Y.png. In Apex 5 the same is possible using icon classes.

1) add an alias for Font-Awesome Icons

This little css will create two aliases for the fa-check and the fa-remove icons. And it will give them a default color.

.syn-check-J:before,.syn-check-Y:before {
  content: "\f00c";
  color: green;
}
.syn-check-N:before {
  content: "\f00d";
  color: #ff3a30; /* color: red; */
}

If you want to know the content code for a different icon you can search in the fontAwesome.min.css file or have a look at some “cheatsheet” pages like this one here: http://astronautweb.co/snippet/font-awesome/

If we would add another attribute:

  font-family:fontAwesome;

then we could use the icon even without the “leading” fa class.
I do not recommend this! Remember in Apex 5.1 we have two icon fonts to choose from – FontAwesome OR Font-Apex. Adding the font-family would prevent switching the icons.

2) html expression to set the class

And then use a normal text field with a html expression.
Html expressions are available for classic reports, but also for interactive reports and interactive grids.

<span class="fa fa-lg syn-check-#COL1#" alt="#COL1#"></span>

Our new classes still can be combined with other font-awesome styles. Here I enlarged them a little bit by adding the “fa-lg” class.

The good thing about an html expression is, that the field value still is the original value. So we can use the interactive report column filters on this value and an export to csv will not add any html tags. This solution is SOC conform. The database query will not bother with the representation of the values.

apex5_YN_icons_filter

Quick. Easy. Useful.

How does it work in 5.1 with Interactive grids?

IGs are slightly different. Especially if they are editable. We can not simply add the icon to a text column. Instead we have a new column type HTML EXPRESSION. In that we can reference a different column.

Here is an example from the Interactive Grid Sample Application (Page 30, Base Edit). The emp table has a column ONLEAVE and holds Y and N values. apex5_YN_icons_IG_column2

The substitution syntax for IG columns does not use # anymore. Instead the expression will look like below. The column value from ONLEAVE is substituted.

<span class="fa syn-check-&ONLEAVE.">&ONLEAVE.</span>

We now face an additional obstacle. The ONLEAVE column is a switch. The switch component will translate Y into Yes and N into No. Our new second column recieves that translated value. We could either add an additional hidden column to the select and referece that one or we can extend our css aliases. Because the switch component look pretty useful, it seems better to include its outcome to the css.

.syn-check-J:before,.syn-check-Y:before,.syn-check-Yes:before {
  content: "\f00c";
  color: green;
}
.syn-check-N:before,.syn-check-No:before {
  content: "\f00d";
  color: #ff3a30; /* color: red; */
}

And here is how the result looks like:
Apex5_YNIcon_IG_column

As you can see the icons look more delicate than before. This is because the sample application uses Font Apex and not Font Awesome anymore.

Example using images

And sometimes we still want an image. Maybe because there is no fitting icon in our font or maybe because the users insist on keeping the old images. This can also be done with css classes. However some more attributes are needed.

Here is an example without further explaination.


.syn-checkImg-J,.syn-checkImg-Y {
  background-image:url("https://upload.wikimedia.org/wikipedia/commons/thumb/0/03/Green_check.svg/240px-Green_check.svg.png");
  background-repeat: no-repeat;
  background-origin: padding-box;
  background-size: 20px 20px;
  padding:0 20px;
}
.syn-checkImg-N {
  background-image:url("https://upload.wikimedia.org/wikipedia/commons/thumb/a/a2/X_mark.svg/210px-X_mark.svg.png");
  background-repeat: no-repeat;
  background-origin: padding-box;
  background-size: 20px 20px;
  padding:0 20px;
}

It works with DIVs and SPAN tags.
And I created a jsfiddle where you can test it out for yourself.
https://jsfiddle.net/1n6s4y3j/

Apex 5.1 session cloning

Introduction

With Apex 5.1 we got a nifty new feature. It is now possible to clone an apex session, so that we can have two (or more) independent APEX sessions running in the same browser.

It only took me 2h to implement this from scratch. So it is really easy to do.

Joel Kallmann describes how to do it in this blog post http://joelkallman.blogspot.de/2016/07/apex-session-isolation-across-multiple.html

There are a few additional tweaks I would like to mention here.

Step 1) Enable session cloning on instance level

logon as sys (or any user with apex_administrator_role).

I first granted my normal DBA account the apex_administrator_role

grant apex_administrator_role to myDBA;

and then as DBA:

begin
apex_instance_admin.set_parameter(
p_parameter => 'CLONE_SESSION_ENABLED',
p_value     => 'Y');
end;
/


If you are in a CDB/PDB environment, with Apex installed in the PDB (recommended) then  make sure to run this on the matching PDB (especially when working with sys).

e.g.

alter session set container = PDBAPEX

Joels article also explains how to enable this for a single workspace. But I got an error message when trying to do so.

"ORA-20987: APEX - Instance parameter not found - Contact your application administrator."

Step 2) Add a new navigation bar entry

Of cause you are free to add this functionality everywhere you want. But you will need a link, that the user has to click on to get a new session. My preference was the navigation bar.

The url for the link is simple. Just add APEX_CLONE_SESSION as the request parameter.

f?p=&APP_ID.:&APP_PAGE_ID.:&APP_SESSION.:APEX_CLONE_SESSION

create a navigation bar list entry with this link

  • Go to “Shared Components/Navigation Bar Lists/navigation bar” (the name of my list).
  • Choose any icon (fa-clone) and label text (“Session klonen”) that you want.
  • The target page needs to be “&APP_PAGE_ID.”. This will use the current page and add it into the link.
  • And most importantly the request needs to be APEX_CLONE_SESSION.

apex51_clone_session_navbar_entry

The entry is now ready and working. However it will replace the session in the current browser tab. But rightclick and “open in new tab” gives us two tabs with a different apex session.

If that is not enough then this next step is wanted too.

Step 3) Open the link in a new page

The goal is to add a TARGET attribute to our link, so that a new tab is always opened when we clone the session. Unfortunatly the navbar template has no option to include link atributes. We could do a kind of injection trick with the url, but I prefere a cleaner way.

To do so we need to modify three small parts.

First copy the navigation bar template as a new template “Navbar with Attributes”

And there we add the user defined property #A03# to our link. This needs to be done in all areas where we find an <a..> tag.At least for the “list template current” and “list template non-current”. I also added it for the sub list entries, even if my navbar doesn’t use sub lists.

apex51_clonesession_template

Don’t forget to add a description “Link Attributes” for the newly added attribute value in the “attribute description” section (scroll down a bit to see it).

Then enhance our existing navbar entry with target=”_blank”

apex51_clonesession_linkattributes

There is a tiny difference between using target=”_blank” or target=someothername.

target=”_blank” will always create a new tab.

target=”_someothername” will open a new tab on the first click. Consecutive clicks however will always reuse this same tab. This can be useful if you want to prevent your users to constantly cloning session after session after session.


And finally make sure that our application uses the new template for showing the navbar list

Shared Components/User Interface Attributes/Desktop/Navigation bar/List Template

apex51_clonesession_userinterface


Result

The navigation bar then could look similar to this here:

apex51_clonesession_navbar_de

Clicking on the “clone session” link will open a new tab in the same browser. In the url we will see that a different session id was created.

The new session will have all the same item values (page items, application items, etc.) as the privious session had. But from this point on, the two sessions will start to differ.

Both sessions will use the same browser cookie. For that reason if one session logs out, then the other session will be logged out too.


How to upgrade from Apex 5.0 to 5.1

Preparation

As a preparation I recommend several steps and checks to prepare the upgrade.

  • Make sure you have a working database backup and just in case a DBA at hand who would be able to restore your database, tablespace or schemas.
  • Workspace clean up – delete applications that are not needed anymore. Especially copies of others application, that were created to test a specific feature or do a proof of concept. Be careful whether you also want to run any included deinstallation scripts. For an Apex update in general you don’t want to delete the connected tables.
  • Software Download – Apex 5.1 can be downloaded from the OTN download page: www.oracle.com/technetwork/developer-tools/apex/downloads/index.html
  • Backup Application – Export the application including all private saved reports
  • Export supporting objects like Theme, Static Application files
  • Backup Image folder – if your image folder is /i/ then make a copy and rename the copy to /i50/
  • Check the Apex 5.1 known issues page:  http://www.oracle.com/technetwork/developer-tools/apex/downloads/apex-51-known-issues-3408261.html

Apart from downloding the new Apex version, none of these steps is really required. But it gives a nice and cozy fealing to be sure to be able to go back.

In Apex 5.1 some features are deprecated and some options did change. It is possible to prepare your application to anticipate the effects of the upgrade. I will cover this in a separate blog post. More importantly read through the “changed behaviour”, “deprecated” and “desupported” sections of the installation manual (https://docs.oracle.com/database/apex-5.1/HTMRN/toc.htm#HTMRN-GUID-8BDFB50B-4EC6-4051-A9B6-7D5805E00C4E ).

Here are some things to consider already in Apex 5.0.

  • Apex.Server plugin
    • does not return an jqXHR object anymore
    • async option deprecated
    • htmldb_getobject desupported => replace with apex.server
  • old Apex themes deprecated
  • check for CANCEL or BACK or PREVIOUS buttons (page redirect) with execute validations = YES. These will do client side validation in Apex 5.1. If that is not wanted, change it to NO.
  • jsTRee plugin deprecated
  • classic reports
    • hidden column type => hidden column
    • no enterable fields!
  • file browse storage => switch from WWV_FLOW_FILES to APEX_APPLICATION_TEMP_FILES
  • desupported attributes or types
    • page: body header, include standard javascript and css
    • region: svg charts, simple chart, classic tree
    • button: pre text, post text
    • item: start and stop grid layout, file browse storage type
  • Conditions deprecated: text= value, text != value, text is (not) contained in item
  • No more: Save state before branching
  • apex_plsql_job package desupported
  • check if you reference the internal hidden fields  (renamed in Apex 5.1): pPageChecksum => pPageItemsProtected, p_md5_checksum=>pPageItemsRowVersion
  • date picker (classic) deprecated
  • several updated javascript libraries

Decide about the upgrade path

Now consider whether you want to do a traditional upgrade (all steps in one go) or if you want to minimize the application downtime (several steps, not for CDB$ROOT installations). Or as oracle calls it: “maximize application uptime”.

To minimize downtime read this chapter in the documentation: https://docs.oracle.com/database/apex-5.1/HTMRN/toc.htm#HTMRN-GUID-411DE0D8-59E1-4267-8751-FD56305ABE4E

Upgrade in one go

The only step needed to do:

Create database schemas and database objects (tables, packages) and do the application migrations.

@apexins.sql tablespace_apex tablespace_files tablespace_temp images

Upgrade with maximum Uptime

Instead of running a single script, we can do the upgrade in several steps. Only during the 3rd step, the end users need to be disconnected. This third step took only 1.01 seconds on my system.

The upgrade of an Application Express instance runs in four phases:

  1. Create database schemas and database objects (tables, packages).
    This essentially creates the Apex_051000 schema.
    -> no influence on running sessions
  2. Migrate application metadata.
    This copies the repository application data from Apex_050000 into Apex_051000.
    To help with that some upgrade triggers were previously installed.
    ->  developers can’t work anymore
  3. Migrate data that runtime applications modify and switch to the new version.
    -> downtime for all (developers and end users)
  4. Migrate additional log and summary data (this step starts automatically)
    -> no influence on running sessions

But we need zero downtime – is it possible?

I’m convinced it is possible to reach a downtimeless application upgrade using the EBR  (edition based redefinition) feature of the oracle database. I have extensive knowledge using EBR even inside Apex. However so far I didn’t have the time to do a proof of concept (POC) for the upgrade. Also this would be an unsupported action (currently). The change would include tweaking serveral non editioned objects (public synonyms, session contexts, registry data) in such a way that they show up differently when used inside an edition.

If any Germany based customer or the Oracle Apex Team itself is interested how to do this and is willing to pay for the time I need to invest in this, then please contact me.

do the upgrade

Unzip the Apex_5.1.zip file into an appropriate folder. And navigate to the apex_5.1/apex folder

If you decide for the “Maximum Uptime” upgrade path, then three scripts need to run. And ORDS needs to be stopped for script 3. To run the scripts we need to know the tablespace names and the image path.

Find the tablespace

The documentation gives examples useing the SYSAUX tablespace. I do not recommend that. Apex should have its own tablespace.

select username, default_tablespace, temporary_tablespace, profile, oracle_maintained
from dba_users
where regexp_like(username,'^(APEX_|ORDS_)');

This shows only the default setting. We can reuse the same tablespace. But it is also possible to install apex 5.1 into a new tablespace. If you want to do that, then this new tablespace needs to be created first.

Sometimes we want to see if the data is really in this default tablespace. Here is a select that will show the data distribution and also how much space is used.

select owner as schema, tablespace_name as data_tbs, nvl(segment_type,' - total -') segment_type, round(sum(bytes)/1024/1024,2) size_in_MB
from dba_extents
where regexp_like(owner,'^(APEX_|ORDS_)')
group by owner, tablespace_name, rollup(segment_type)
;

Example result

SCHEMA        DATA_TBS SEGMENT_TYPE SIZE_IN_MB
APEX_050000   APEX     INDEX        239,69
APEX_050000   APEX     TABLE        267,19
APEX_050000   APEX     LOBINDEX     12,75
APEX_050000   APEX     LOBSEGMENT   240,31
APEX_050000   APEX     - total -    759,94
ORDS_METADATA ORDS     INDEX        4,5
ORDS_METADATA ORDS     TABLE        1,63
ORDS_METADATA ORDS     LOBINDEX     0,19
ORDS_METADATA ORDS     LOBSEGMENT   0,38
ORDS_METADATA ORDS     - total -    6,69

This is a example of one of my apex environments. As you can see there is only one Apex tablespace “APEX” used. Approximatly the same amount of data is in tables, in indexes and in LOBs. LOBSEGMENT indicates that there had been some wwv_flow_files activities going on.

Run the scripts

The scripts are located in the apex subfolder. For example D:/product/apex/apex_5.1/apex.

Navigate to that folder and start an sqlplus session with sys as sysdba. If you are in a CDB/PDB environment connect to the PDB not to CDB$ROOT. To connect to the PDB, the service name needs to be provided. Because of that also a running listener and a matching tnsnames.ora file is needed.

Assuming the following settings:

  • tablespace for apex and apex files: APEX
  • temp tablespace: TEMP
  • image directory: /i/

Then those 3 scripts need to run.

@apexins1.sql APEX APEX TEMP /i/
@apexins2.sql APEX APEX TEMP /i/

stop ORDS

@apexins3.sql APEX APEX TEMP /i/

restart ORDS

Phase 4 is automatically started by running a dbms_scheduler job.

Check privs and synonyms

Sometimes we give extra access from the Apex Schema to our own custom schema. For example in one Application I extended the Apex Feedback functionality and did use the view APEX_TEAM_FEEDBACK. Such changes need to be moved to the new APEX_050100 schema.

ACLs

Here is just how to check if the Apex 5.0 schema has any network ACLs set.

SELECT *
FROM DBA_HOST_ACES xe
where principal = 'APEX_050000';

I created a script to duplicate all ACEs that exists for APEX_050000 to APEX_050100.

The script is shown and explained in a separate blog post.


Grants

Here is just how to check if the Apex 5.0 schema has any objects granted to other schemas.


select *
from all_tab_privs
where grantor like 'APEX\_%' escape '\'
and grantee not in ('PUBLIC','SYS','SYSTEM');

It will show objects like tables, views and packages that have privileges granted directly.

To see only the missing grants you can run the following statement. If it returns no rows, then you are fine.


select GRANTEE , TABLE_SCHEMA , TABLE_NAME , PRIVILEGE , GRANTABLE ,HIERARCHY
from all_tab_privs
where grantor in ('APEX_050000','APEX_050100')
and not regexp_like (grantee,'^(APEX_|ORDS_|SYSTEM$|PUBLIC$|SYS$)')
group by GRANTEE , TABLE_SCHEMA , TABLE_NAME , PRIVILEGE , GRANTABLE ,HIERARCHY
having count(*) = 1 and min(grantor) = 'APEX_050000';

Those grants probably need to be copied to the new apex_50100 schema.

Search Source code

You should search the complete application, if there are any references to APEX_050000. This should be done after the migration.

downgrade to 5.0

The section how to downgrade an application back to 5.0 is currently missing from the documentation. Here is a official blog post how to do it: http://jastraub.blogspot.de/2017/01/ooops-i-did-it-again.html

This is the sql script that Jason Straub published to do the downgrade:

alter session set current_schema = SYS;

@wwv_flow_val.sql
@wwv_flow_val.plb 

begin
 dbms_utility.compile_schema('APEX_050000');
end;
/ 

set define '^'
@validate_apex x x APEX_050000

begin
 for i in ( select owner, trigger_name
 from sys.dba_triggers
 where owner = 'APEX_050000'
 and trigger_name like 'WWV_FLOW_UPGRADE_%'
 order by 1 )
 loop
 sys.dbms_output.put_line('Dropping trigger '||i.owner||'.'||i.trigger_name);
 execute immediate 'drop trigger '||i.owner||'.'||i.trigger_name;
 end loop;
end;
/

ALTER SESSION SET CURRENT_SCHEMA = APEX_050000;
exec apex_050000.wwv_flow_upgrade.switch_schemas('APEX_050100','APEX_050000');

ALTER SESSION SET CURRENT_SCHEMA = SYS;
drop context sys.APEX$SESSION;
create context sys.APEX$SESSION using APEX_050000.WWV_FLOW_SESSION_CONTEXT;
declare
 l_apex_version varchar2(30);
begin
 l_apex_version := apex_050000.wwv_flows_release;
 dbms_registry.downgrading('APEX','Oracle Application Express','validate_apex','APEX_050000');
 dbms_registry.downgraded('APEX',l_apex_version);
 validate_apex;
end;
/

select * from dba_tablespaces ;

select username, default_tablespace, temporary_tablespace, profile, oracle_maintained
from dba_users
where regexp_like(username,'^(APEX_|ORDS_)');

select owner as schema, tablespace_name as data_tablespace, nvl(segment_type,' - total -') segment_type, round(sum(bytes)/1024/1024,2) size_in_MB
from dba_extents
where regexp_like(owner,'^(APEX_|ORDS_)')
group by owner, tablespace_name, rollup(segment_type)
;

Align topbar divs horizontally in Apex 5 UT

Using the 12 column grid in Apex 5, we can easily position regions (=divs) as we want.

Unfortunately this is not possible in the title bar where the breadcrumbs reside. There simply is no column grid in the breadcrumb bar. But sometimes it is useful to add some regions or DIVs there.

Here is an example how two regions look that are added to the breadcrumb bar.

topbar_position_vertical
default vertical alignment

They are always aligned one below the other. To use the space available we often want to stack the divs beside each other.

A tiny little bit of css can change this alignment. Add this on page level to the css section.

.syn-app--topbarcontainer, div#R_TOPBAR {
  border-spacing: 2px 2px;
  border: 0px solid;
  display: -webkit-flex;
  display: -ms-flexbox;
  display: flex;
  flex-direction: row;
};

The main trick here is to use a flex display with direction row. This will try to align all child divs in a horizontal row.

More infos about flex property: http://www.w3schools.com/cssref/css3_pr_flex-direction.asp

The css class “syn-app–topbarcontainer” then needs to be applied to a parent region. This region should have the “Blank with Attributes” template (Apex 5.1).

Alternatively the region can use R_TOPBAR as a region alias.

The two Regions A and B are subregions. The subregions can be used with any template. The example uses the standard template with some minified settings.
 

topbar_position_PD02
region settings

And this is how it looks in the application:

topbar_position_horizontal
horizontal alignment

This works in Apex 5.0 and also in Apex 5.1 (early adopter).

Be aware that this is not a responsive layout. So when the browser window size is lessened, then the regions will not position below each other.