APEX 5.1 quick tipp: select * considerations for remote views

Many developers don’t like select *. I’m a big fan of it, but there are some edge cases where one needs to be careful. I don’t want to discuss pros and cons here in this thread. This is just to point out a few areas where useing select * gives not the advantage that one could expect.

I like to program select * in multiple scenarios. Usually to express, that I want to access (almost) every column from that table or view. I’m too lazy to write down every single column name.

A typical APEX example would be to edit a table via an Interactive Grid.

Scenario setup

Imagine a remote database with a table MYTAB. We access this remote database via a database link from a local database with APEX installed. In the SQL workshop we have a view that was originally created as

create view myTab_remote as
select * from mytab@dblinkname;

That advantage of that view is, that we create a layer where the name of the DB link is used. Using this layer we don’t need to know the DB link name inside our APEX application. Which makes it easier to switch or change the link.
Also the APEX framework is now able to use the oracle data dictionary for that view. Newer APEX versions have improved capabilities to work with remote tables. But here I’m talking about version 5.1.

Our Interactive Grid uses a fairly simple query.

select * from myTab_remote
where parent_id = :P1_MASTER_ID

Modifications

So what happens when a column is added on the remote database to our table, for example the column price_unit.

alter table myTab
add price_unit varchar2(5);

The APEX application is still working, no issue happend there. It does not automatically has the new column.

In general this is good. We have a robust appliaction that does not break, simply because a new column was added (it would break if a column is dropped however).

Certainly the column was added with some intention in mind. We also want to show and edit this new column in our Interactive Grid.

How to add this new column to our application?

First step is to update the view. One might think this is not necessary, because we created the view using select *. Unfortunatly that is not how Oracle works, especially not via a database link.
When investigating the view via the SQL tab in the SQL workshop, we find that the DDL is different than what one would think.

CREATE OR REPLACE FORCE VIEW "MYTAB_REMOTE" ("ID", "PARENT_ID", "COL_A",  "COL_B",  "PRICE") AS 
   select  "ID", "PARENT_ID", "COL_A",  "COL_B",  "PRICE"  from MYTAB@DBLINKNAME
 /

The column list was expanded into the select statement and also captured as the column list name of the view itself. The new column price_unit is missing.

To add the new column we could again simply create the view. A normal recompile is not enough. Btw. this also happens with views over local tables.

create or replace view myTab_remote as
select * from mytab@dblinkname;

Hint: never use the FORCE keyword for development work. It may hide important error messages.

After that we can select from the view and will see the new column. However it is still missing from the Interactive Grid.

The second step is to push APEX into reevaluating the column list for this view.

Simply validating the SQL query will not be enough. I found the following sequence of steps do work.
First add an alias and a new dummy column to the query.

select m.*, 'x' new_dummy_col
from myTab_remote m
where m.parent_id = :P1_MASTER_ID

Validate it and press OK. This results in two new columns added to the grid column list. Then enter the SQL query again and remove the dummy column.

select m.*
from myTab_remote m
where m.parent_id = :P1_MASTER_ID

Result is we now have the new column in our list.

The third and last step is to add this column to our default reports.

The new column is at the very end of the column list. On an IG it is shown, on an IR it is not shown by default. In any case we want to move this new column via the Actions > Columns menu to the correct position. And then save the public report Actions > Save Report. This should be done for each public report in that Grid.

Conclusion

Using select * in a APEX Interactive Grid scenario did not lower the maintenance needed when adding new columns to the base table. The second step even might be slightly confusing for many developers. So it might be a good idea to use a complete column list there instead of select *.

Site note: Using select * in other scenarios like inside PLSQL indeed does lower the maintenance when done right compared to an explicit full column list.

add JET 5.1/5.2 to APEX via CDN

How to use the newest Oracle JET version in APEX?

While writing this blog post the most recent version of Oracle JET is version 5.1.0. 5.2.0.

5.1 was an interesting version, since charts have been improved to accept an data provider attribute (http://www.oracle.com/webfolder/technetwork/jet/jetCookbook.html?component=chart&demo=dataProvider)

So let’s assume we want to use this version.

Some time ago I published how to integrate JET [2.2.0] into Apex 5.0. It needed quite some setup to do. Some steps probably could have been done in a more elegant way. Additionally see John Snyders recommendations Using Oracle JET from APEX which do eliminate some of the issues that I encountered. For example there is really no need to throw out hammer.js from the theme.

Meanwhile Oracle has made JET available via the Oracle Content Delivery Network (CDN). And this makes it possible to load the necessary JET libraries from this CDN instead of installing it locally to our webserver. Awesome stuff!

I tested this solution with Apex 5.1.1 (on premise) and with Apex 18.1 (on apex.oracle.com).

Which source files are needed?

We need three types of sources.

  • require to load and install additional libraries
  • the Oracle Jet stylesheets
  • various Oracle Jet javascript libraries

Some comments about those files.

Require.js already comes installed in your local Apex installation. It might be a different version, but still is an option to be considered. I only tested using require in the version that matches with Oracle Jet.

Oracle jet now has a file bundled-config.js which adds all of the jet libraries. This might be a bit too much, but it provides a quick and easy way to install JET. In case we only want to use a special visualization, this provides access to way more libraries than needed. I didn’t test if performance improves if I install only the necessary libraries for a special visualization. I hope that because of require, the performance difference would be minimal. Require only loads a file, when it is really needed. Inspecting the network traffic seems to support that notice.

Once those sources are installed to our page, we can copy any example from the Jet Cookbook and use it in our application. Be aware some cookbook examples use additional resources, like JSON data files. You need to copy and reference those too.

New page template

The three source files need to be added to the page. I suggest to create a new page template so that the logic can be reused for multiple pages.

Make a copy of the standard page template. I named it something like “Standard + Jet 5.1”. Then add a few lines to enable Oracle Jet 5.1.0 on this new template.

The two javascript files need to be added to the javascript file section.

https://static.oracle.com/cdn/jet/v5.1.0/3rdparty/require/require.js
https://static.oracle.com/cdn/jet/v5.1.0/default/js/bundles-config.js

page_template_javascript

As an alternative to the bundles-config.js file, we can install the whole set of the require config in the function declaration section:

//-----------------------------JET STUFF -----------------------------
// alternative source locations
//#APP_IMAGES#oraclejet/main.js
//#IMAGE_PREFIX#libraries/oraclejet/js
requirejs.config({
  // Path mappings for the logical module names
  paths: {
    'knockout': 'https://static.oracle.com/cdn/jet/v5.1.0/3rdparty/knockout/knockout-3.4.2',
    'jquery': 'https://static.oracle.com/cdn/jet/v5.1.0/3rdparty/jquery/jquery-3.1.1.min',
    'jqueryui-amd': 'https://static.oracle.com/cdn/jet/v5.1.0/3rdparty/jquery/jqueryui-amd-1.12.0.min',
    'ojs': 'https://static.oracle.com/cdn/jet/v5.1.0/default/js/min',
    'ojL10n': 'https://static.oracle.com/cdn/jet/v5.1.0/default/js/ojL10n',
    'ojtranslations': 'https://static.oracle.com/cdn/jet/v5.1.0/default/js/resources',
    'text': 'https://static.oracle.com/cdn/jet/v5.1.0/3rdparty/require/text',
    'promise': 'https://static.oracle.com/cdn/jet/v5.1.0/3rdparty/es6-promise/es6-promise.min',
    'hammerjs': 'https://static.oracle.com/cdn/jet/v5.1.0/3rdparty/hammer/hammer-2.0.8.min',
    'signals': 'https://static.oracle.com/cdn/jet/v5.1.0/3rdparty/js-signals/signals.min',
    'ojdnd': 'https://static.oracle.com/cdn/jet/v5.1.0/3rdparty/dnd-polyfill/dnd-polyfill-1.0.0.min',
    'css': 'https://static.oracle.com/cdn/jet/v5.1.0/3rdparty/require-css/css.min',
    'customElements': 'https://static.oracle.com/cdn/jet/v5.1.0/3rdparty/webcomponents/custom-elements.min',
    'proj4js': 'https://static.oracle.com/cdn/jet/v5.1.0/3rdparty/proj4js/dist/proj4'
  },
  // Shim configurations for modules that do not expose AMD
  shim: {
    'jquery': {
      exports: ['jQuery', '$']
    }
  }

});

If you want to use this option and Jet 5.2 then I suggest to look into the 5.2.0 bundles-config.js file, and copy the correct paths out of it.

page_template_function_declaration

Remember above code is not needed! It comes preconfigured in the bundle-config.js file. I offer it only as an alternative installation that gives a little more control over the libraries.

Finally we need to add some css. Add the link for the JET style to the CSS file section.

https://static.oracle.com/cdn/jet/v5.1.0/default/css/alta/oj-alta-min.css

And additionally you might want to add a little inline css. See the issues section for an explanation.

page_template_css

And finally use this new page template for your page.

Example result

And this is how using Oracle Jet 5.1/5.2 in Apex can look like.

JET_Dashboard_Sunburst
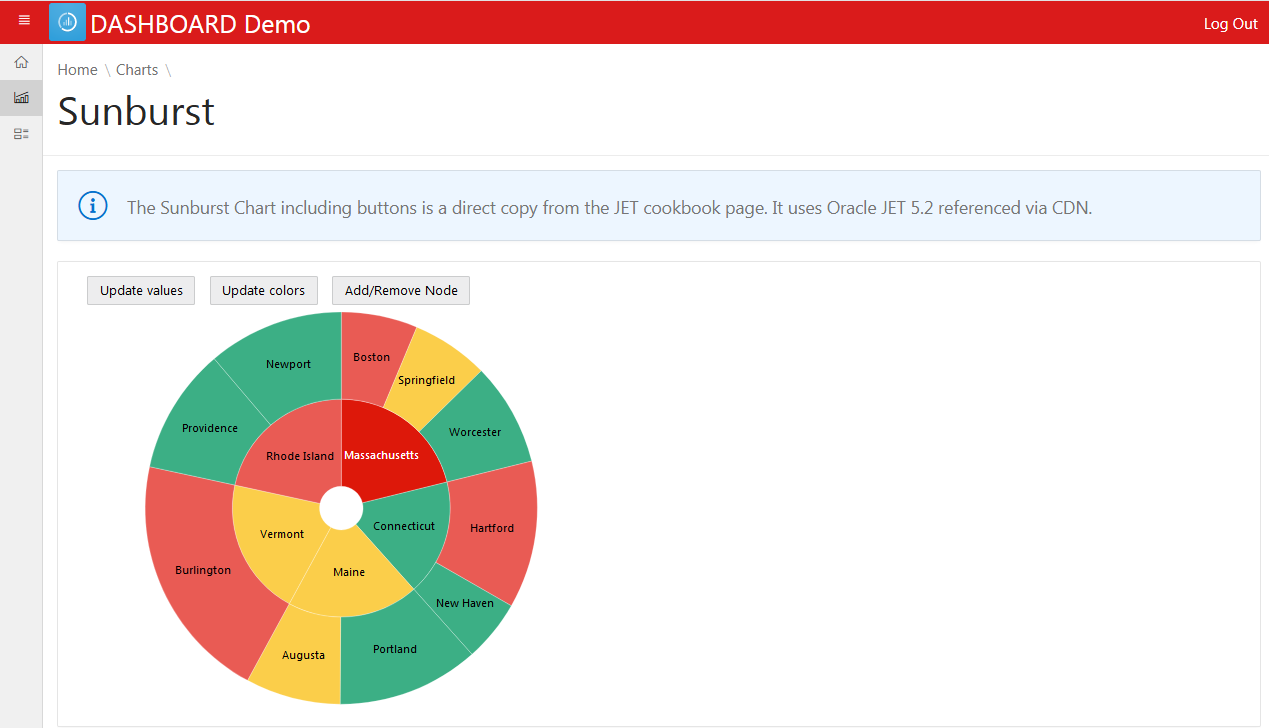
The source code for that chart can be found at the end of the post. Or go to the Jet Cookbook and try it our there. Did you notice, you can spin the whole wheel around?

Issues

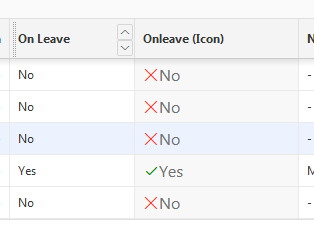
There are some minor problems that I encountered. Especially some css issues because JET overwrites several of the Apex Theme css settings. Which is not good. I made a sample demo to show the issues. I only tested it with the red theme style, but I think the issues persist in all styles.
Theme Bug Demo

I do have css based workarounds for the issues I found so far. The solution is also demonstrated in the demo app. Here is the css code that can be added to the page or the template (css section).

.t-Header .t-Button--header, .t-Header .t-Button--header.is-active, .t-Header-logo, a.t-Header-logo-link{
    color:#fff
}

.t-Alert--horizontal .t-Alert-icon .t-Icon,
.apex-icons-fontapex .t-Alert--defaultIcons.t-Alert--horizontal .t-Alert-icon .t-Icon {
    width: 48px;
    height: 48px;
    line-height: 48px;
}

I think those issue are really bugs. And the Apex team and the Jet team can both be held responsible. The APEX side should have used a better css specificity for the header styles, the JET side should not set styles for things like a:visited for the whole html page.

And I believe there are more side effects. That is also the main reason why I would add JET only to specific pages. And why I would avoid mixing normal apex charts with newer version JET charts. Don’t mistake me, I made a few simple tests and it worked. I could create a region with a normal apex jet chart (apex 5.1) and combine it with a region using a CDN loaded JET chart (Legend + PictoChart). I just didn’t test it thoroughly enough to recommend it.

What is a CDN and is it safe?

https://en.wikipedia.org/wiki/Content_delivery_network

A content delivery network provides ressources, like in the JET case, javascript and css files, in a way that optimizes access times. So if a user accesses our application from Europe, the ressources will be delivered from a European server. If the user sits in America, an American server is choosen to deliver the files. This also frees up some bandwidth for our own webserver. After the first load, the browser usually caches the files.

If different applications all use the same remote ressource via CDN, the browser can reuse the cached files. This is especially interesting for the very common libraries, like JQuery.

But performance is not the only argument. With Oracle JET I find it way more convinient to load the newest JET version directly from Oracle instead of going through the hassle and install it to the local webserver. Often this involves using deployments scripts and documenting what exactly to do, so that in an enterprise environment, the same steps can be later made for the production server.

But is it safe to use? The most secure method is, if you download the js files from a trusted source (Oracle CDN). Then inspect each file, if there is any malicious code in it. Once you are sure it is safe, you install the files onto your own webserver and serve the ressources from there.

One of the most basic security features is to use HTTPS and not HTTP, especially when accessing remote ressources. This lowers the chance for man in the middle attacks essentially.

Especially the DNS lookup to the CDN server might be a performance drain. But in terms of web speed there are many things to consider.
Pros

  • Ease of installation
  • Performance boost for global user base
  • Browsers limit parallel loads from the same source. Loading additional ressources from a second source circumvents that issue.
  • Bandwidth moved from own webserver to CDN

Cons

  • Less control over the logic that is loaded – you need to trust the CDN provider
  • CDN provider could be down
  • For local users CDN will be slower than serving from local webserver

quick conclusion

Oracle JET via Oracle CDN is a good concept especially during a developement and testing phase. For on premise production usage you might want to consider to install Oracle JET to your local webserver and run it from there.

more

Here are a few links that I found interesting and that cover several other topics about using or not using a CDN.

updates and addendum

Oracle JET 5.2.0

Very recently Oracle JET 5.2.0 was released. I test it only very briefly. You just have to change the version number in the source file path.

Here is the official release schedule for the future Jet versions.

Sunburst Example

The following code is a direct copy from the Oracle Jet Cookbook.

Create a static region and add this as the region source.
Unfortunatly I encounter some issues when posting oj-tags here. The code is missing in the final view. Best way is to go directly to the source and copy the code from there. Everything inside the body tag is needed.

<div id="sampleDemo" class="demo-padding demo-container">
  <div id="componentDemoContent" style="width:1px;min-width:100%;">

    <div id='sunburst-container'>
        <div style="padding-left:16px;float:left;">
          Update values
        </div>
        <div style="padding-left:16px;float:left;">
          Update colors
        </div>
        <div style="padding-left:16px;float:left;">
          Add/Remove Node
        </div>
        <br style="clear:left;" />


    </div>


  </div>
</div>

Or copy the code from this screenshot
JET_Sunburst_html_source

Add this on the page level to the “function and global variable declaration”:


require(['ojs/ojcore', 'knockout', 'jquery', 'ojs/ojknockout',
    'ojs/ojbutton', 'ojs/ojsunburst'],
function(oj, ko, $)
{
    function SunburstModel() {
        var self = this;

        var colorHandler = new oj.ColorAttributeGroupHandler();

        var MA = createNode("Massachusetts", "0", getValue(), getColor());
        var CT = createNode("Connecticut", "1", getValue(), getColor());
        var ME = createNode("Maine", "2", getValue(), getColor());
        var VT = createNode("Vermont", "3", getValue(), getColor());
        var RI = createNode("Rhode Island", "4", getValue(), getColor());

        addChildNodes(MA, [
          createNode("Boston", "00", getValue(), getColor()),
          createNode("Springfield", "01", getValue(), getColor()),
          createNode("Worcester", "02", getValue(), getColor())
        ]);
        addChildNodes(CT, [
          createNode("Hartford", "10", getValue(), getColor()),
          createNode("New Haven", "11", getValue(), getColor())
        ]);
        addChildNodes(ME, [
          createNode("Portland", "20", getValue(), getColor()),
          createNode("Augusta", "21", getValue(), getColor())
        ]);
        addChildNodes(VT, [
          createNode("Burlington", "30", getValue(), getColor())
        ]);
        addChildNodes(RI, [
          createNode("Providence", "40", getValue(), getColor()),
          createNode("Newport", "41", getValue(), getColor())
        ]);
        var nodes = [MA, CT, ME, VT, RI];
        function createNode(label, id, value, color) {
          return {label: label,
                id: id,
                value: value,
                color: color,
                shortDesc: "<b>" + label +
                  "</b>
Value: " + value};
        }

        function addChildNodes(parent, childNodes) {
          parent.nodes = [];
          for (var i = 0; i &lt; childNodes.length; i++) {
            parent.nodes.push(childNodes[i]);
          }
        }

        function getValue() {
            return Math.round(50 + 100 * Math.random());
        }

        function getColor() {
            return colorHandler.getValue(Math.floor(Math.random() * 4));
        }

        self.nodeValues = ko.observableArray(nodes);

        self.valueButtonClick = function(event) {
            for (var i = 0; i &lt; nodes.length; i++) {
                if (Math.random() &lt; 0.4)
                    nodes[i].value = getValue();
                for (var j=0; j &lt; nodes[i].nodes.length; j++) {
                    if (Math.random() &lt; 0.4)
                        nodes[i].nodes[j].value = getValue();
                }
            }
            self.nodeValues(nodes);
            return true;
        }

        self.colorButtonClick = function(event) {
            for (var i = 0; i &lt; nodes.length; i++) {
                if (Math.random() &lt; 0.3)
                    nodes[i].color = getColor();
                for (var j=0; j &lt; nodes[i].nodes.length; j++) {
                    if (Math.random() &lt; 0.3)
                        nodes[i].nodes[j].color = getColor();
                }
            }
            self.nodeValues(nodes);
            return true;
        }

        self.nodeButtonClick = function(event) {
            if (nodes.length &lt;= 5) {
                var newNode = {
                  id: &quot;5&quot;, value: getValue(),
                  color: getColor(), label: &quot;New York&quot;,
                  nodes: [
                     {id: &quot;50&quot;, value: getValue(),
                        color: getColor(), label: &quot;New York City&quot;},
                     {id: &quot;51&quot;, value: getValue(),
                        color: getColor(), label: &quot;Albany&quot;}
                  ]
                };
                nodes.push(newNode);
            }
            else {
                nodes.pop();
            }
            self.nodeValues(nodes);
            return true;
        }
    }

    var sunburstModel = new SunburstModel();

    $(
        function()
        {
            ko.applyBindings(sunburstModel,
                    document.getElementById(&#039;sunburst-container&#039;));
	}
    );
});	

Apex 5 – show Y/N columns as font awesome icons

apex5_YN_icons

The database column value is Y or N (J or N for German databases). In the past I rendered such columns using images that had a name, where the column value could be appended to, for example IconCheckbox_Y.png. In Apex 5 the same is possible using icon classes.

1) add an alias for Font-Awesome Icons

This little css will create two aliases for the fa-check and the fa-remove icons. And it will give them a default color.

.syn-check-J:before,.syn-check-Y:before {
  content: "\f00c";
  color: green;
}
.syn-check-N:before {
  content: "\f00d";
  color: #ff3a30; /* color: red; */
}

If you want to know the content code for a different icon you can search in the fontAwesome.min.css file or have a look at some “cheatsheet” pages like this one here: http://astronautweb.co/snippet/font-awesome/

If we would add another attribute:

  font-family:fontAwesome;

then we could use the icon even without the “leading” fa class.
I do not recommend this! Remember in Apex 5.1 we have two icon fonts to choose from – FontAwesome OR Font-Apex. Adding the font-family would prevent switching the icons.

2) html expression to set the class

And then use a normal text field with a html expression.
Html expressions are available for classic reports, but also for interactive reports and interactive grids.

<span class="fa fa-lg syn-check-#COL1#" alt="#COL1#"></span>

Our new classes still can be combined with other font-awesome styles. Here I enlarged them a little bit by adding the “fa-lg” class.

The good thing about an html expression is, that the field value still is the original value. So we can use the interactive report column filters on this value and an export to csv will not add any html tags. This solution is SOC conform. The database query will not bother with the representation of the values.

apex5_YN_icons_filter

Quick. Easy. Useful.

How does it work in 5.1 with Interactive grids?

IGs are slightly different. Especially if they are editable. We can not simply add the icon to a text column. Instead we have a new column type HTML EXPRESSION. In that we can reference a different column.

Here is an example from the Interactive Grid Sample Application (Page 30, Base Edit). The emp table has a column ONLEAVE and holds Y and N values. apex5_YN_icons_IG_column2

The substitution syntax for IG columns does not use # anymore. Instead the expression will look like below. The column value from ONLEAVE is substituted.

<span class="fa syn-check-&ONLEAVE.">&ONLEAVE.</span>

We now face an additional obstacle. The ONLEAVE column is a switch. The switch component will translate Y into Yes and N into No. Our new second column recieves that translated value. We could either add an additional hidden column to the select and referece that one or we can extend our css aliases. Because the switch component look pretty useful, it seems better to include its outcome to the css.

.syn-check-J:before,.syn-check-Y:before,.syn-check-Yes:before {
  content: "\f00c";
  color: green;
}
.syn-check-N:before,.syn-check-No:before {
  content: "\f00d";
  color: #ff3a30; /* color: red; */
}

And here is how the result looks like:
Apex5_YNIcon_IG_column

As you can see the icons look more delicate than before. This is because the sample application uses Font Apex and not Font Awesome anymore.

Example using images

And sometimes we still want an image. Maybe because there is no fitting icon in our font or maybe because the users insist on keeping the old images. This can also be done with css classes. However some more attributes are needed.

Here is an example without further explaination.


.syn-checkImg-J,.syn-checkImg-Y {
  background-image:url("https://upload.wikimedia.org/wikipedia/commons/thumb/0/03/Green_check.svg/240px-Green_check.svg.png");
  background-repeat: no-repeat;
  background-origin: padding-box;
  background-size: 20px 20px;
  padding:0 20px;
}
.syn-checkImg-N {
  background-image:url("https://upload.wikimedia.org/wikipedia/commons/thumb/a/a2/X_mark.svg/210px-X_mark.svg.png");
  background-repeat: no-repeat;
  background-origin: padding-box;
  background-size: 20px 20px;
  padding:0 20px;
}

It works with DIVs and SPAN tags.
And I created a jsfiddle where you can test it out for yourself.
https://jsfiddle.net/1n6s4y3j/

Apex 5.1 session cloning

Introduction

With Apex 5.1 we got a nifty new feature. It is now possible to clone an apex session, so that we can have two (or more) independent APEX sessions running in the same browser.

It only took me 2h to implement this from scratch. So it is really easy to do.

Joel Kallmann describes how to do it in this blog post http://joelkallman.blogspot.de/2016/07/apex-session-isolation-across-multiple.html

There are a few additional tweaks I would like to mention here.

Step 1) Enable session cloning on instance level

logon as sys (or any user with apex_administrator_role).

I first granted my normal DBA account the apex_administrator_role

grant apex_administrator_role to myDBA;

and then as DBA:

begin
apex_instance_admin.set_parameter(
p_parameter => 'CLONE_SESSION_ENABLED',
p_value     => 'Y');
end;
/


If you are in a CDB/PDB environment, with Apex installed in the PDB (recommended) then  make sure to run this on the matching PDB (especially when working with sys).

e.g.

alter session set container = PDBAPEX

Joels article also explains how to enable this for a single workspace. But I got an error message when trying to do so.

"ORA-20987: APEX - Instance parameter not found - Contact your application administrator."

Step 2) Add a new navigation bar entry

Of cause you are free to add this functionality everywhere you want. But you will need a link, that the user has to click on to get a new session. My preference was the navigation bar.

The url for the link is simple. Just add APEX_CLONE_SESSION as the request parameter.

f?p=&APP_ID.:&APP_PAGE_ID.:&APP_SESSION.:APEX_CLONE_SESSION

create a navigation bar list entry with this link

  • Go to “Shared Components/Navigation Bar Lists/navigation bar” (the name of my list).
  • Choose any icon (fa-clone) and label text (“Session klonen”) that you want.
  • The target page needs to be “&APP_PAGE_ID.”. This will use the current page and add it into the link.
  • And most importantly the request needs to be APEX_CLONE_SESSION.

apex51_clone_session_navbar_entry

The entry is now ready and working. However it will replace the session in the current browser tab. But rightclick and “open in new tab” gives us two tabs with a different apex session.

If that is not enough then this next step is wanted too.

Step 3) Open the link in a new page

The goal is to add a TARGET attribute to our link, so that a new tab is always opened when we clone the session. Unfortunatly the navbar template has no option to include link atributes. We could do a kind of injection trick with the url, but I prefere a cleaner way.

To do so we need to modify three small parts.

First copy the navigation bar template as a new template “Navbar with Attributes”

And there we add the user defined property #A03# to our link. This needs to be done in all areas where we find an <a..> tag.At least for the “list template current” and “list template non-current”. I also added it for the sub list entries, even if my navbar doesn’t use sub lists.

apex51_clonesession_template

Don’t forget to add a description “Link Attributes” for the newly added attribute value in the “attribute description” section (scroll down a bit to see it).

Then enhance our existing navbar entry with target=”_blank”

apex51_clonesession_linkattributes

There is a tiny difference between using target=”_blank” or target=someothername.

target=”_blank” will always create a new tab.

target=”_someothername” will open a new tab on the first click. Consecutive clicks however will always reuse this same tab. This can be useful if you want to prevent your users to constantly cloning session after session after session.


And finally make sure that our application uses the new template for showing the navbar list

Shared Components/User Interface Attributes/Desktop/Navigation bar/List Template

apex51_clonesession_userinterface


Result

The navigation bar then could look similar to this here:

apex51_clonesession_navbar_de

Clicking on the “clone session” link will open a new tab in the same browser. In the url we will see that a different session id was created.

The new session will have all the same item values (page items, application items, etc.) as the privious session had. But from this point on, the two sessions will start to differ.

Both sessions will use the same browser cookie. For that reason if one session logs out, then the other session will be logged out too.


How to upgrade from Apex 5.0 to 5.1

Preparation

As a preparation I recommend several steps and checks to prepare the upgrade.

  • Make sure you have a working database backup and just in case a DBA at hand who would be able to restore your database, tablespace or schemas.
  • Workspace clean up – delete applications that are not needed anymore. Especially copies of others application, that were created to test a specific feature or do a proof of concept. Be careful whether you also want to run any included deinstallation scripts. For an Apex update in general you don’t want to delete the connected tables.
  • Software Download – Apex 5.1 can be downloaded from the OTN download page: www.oracle.com/technetwork/developer-tools/apex/downloads/index.html
  • Backup Application – Export the application including all private saved reports
  • Export supporting objects like Theme, Static Application files
  • Backup Image folder – if your image folder is /i/ then make a copy and rename the copy to /i50/
  • Check the Apex 5.1 known issues page:  http://www.oracle.com/technetwork/developer-tools/apex/downloads/apex-51-known-issues-3408261.html

Apart from downloding the new Apex version, none of these steps is really required. But it gives a nice and cozy fealing to be sure to be able to go back.

In Apex 5.1 some features are deprecated and some options did change. It is possible to prepare your application to anticipate the effects of the upgrade. I will cover this in a separate blog post. More importantly read through the “changed behaviour”, “deprecated” and “desupported” sections of the installation manual (https://docs.oracle.com/database/apex-5.1/HTMRN/toc.htm#HTMRN-GUID-8BDFB50B-4EC6-4051-A9B6-7D5805E00C4E ).

Here are some things to consider already in Apex 5.0.

  • Apex.Server plugin
    • does not return an jqXHR object anymore
    • async option deprecated
    • htmldb_getobject desupported => replace with apex.server
  • old Apex themes deprecated
  • check for CANCEL or BACK or PREVIOUS buttons (page redirect) with execute validations = YES. These will do client side validation in Apex 5.1. If that is not wanted, change it to NO.
  • jsTRee plugin deprecated
  • classic reports
    • hidden column type => hidden column
    • no enterable fields!
  • file browse storage => switch from WWV_FLOW_FILES to APEX_APPLICATION_TEMP_FILES
  • desupported attributes or types
    • page: body header, include standard javascript and css
    • region: svg charts, simple chart, classic tree
    • button: pre text, post text
    • item: start and stop grid layout, file browse storage type
  • Conditions deprecated: text= value, text != value, text is (not) contained in item
  • No more: Save state before branching
  • apex_plsql_job package desupported
  • check if you reference the internal hidden fields  (renamed in Apex 5.1): pPageChecksum => pPageItemsProtected, p_md5_checksum=>pPageItemsRowVersion
  • date picker (classic) deprecated
  • several updated javascript libraries

Decide about the upgrade path

Now consider whether you want to do a traditional upgrade (all steps in one go) or if you want to minimize the application downtime (several steps, not for CDB$ROOT installations). Or as oracle calls it: “maximize application uptime”.

To minimize downtime read this chapter in the documentation: https://docs.oracle.com/database/apex-5.1/HTMRN/toc.htm#HTMRN-GUID-411DE0D8-59E1-4267-8751-FD56305ABE4E

Upgrade in one go

The only step needed to do:

Create database schemas and database objects (tables, packages) and do the application migrations.

@apexins.sql tablespace_apex tablespace_files tablespace_temp images

Upgrade with maximum Uptime

Instead of running a single script, we can do the upgrade in several steps. Only during the 3rd step, the end users need to be disconnected. This third step took only 1.01 seconds on my system.

The upgrade of an Application Express instance runs in four phases:

  1. Create database schemas and database objects (tables, packages).
    This essentially creates the Apex_051000 schema.
    -> no influence on running sessions
  2. Migrate application metadata.
    This copies the repository application data from Apex_050000 into Apex_051000.
    To help with that some upgrade triggers were previously installed.
    ->  developers can’t work anymore
  3. Migrate data that runtime applications modify and switch to the new version.
    -> downtime for all (developers and end users)
  4. Migrate additional log and summary data (this step starts automatically)
    -> no influence on running sessions

But we need zero downtime – is it possible?

I’m convinced it is possible to reach a downtimeless application upgrade using the EBR  (edition based redefinition) feature of the oracle database. I have extensive knowledge using EBR even inside Apex. However so far I didn’t have the time to do a proof of concept (POC) for the upgrade. Also this would be an unsupported action (currently). The change would include tweaking serveral non editioned objects (public synonyms, session contexts, registry data) in such a way that they show up differently when used inside an edition.

If any Germany based customer or the Oracle Apex Team itself is interested how to do this and is willing to pay for the time I need to invest in this, then please contact me.

do the upgrade

Unzip the Apex_5.1.zip file into an appropriate folder. And navigate to the apex_5.1/apex folder

If you decide for the “Maximum Uptime” upgrade path, then three scripts need to run. And ORDS needs to be stopped for script 3. To run the scripts we need to know the tablespace names and the image path.

Find the tablespace

The documentation gives examples useing the SYSAUX tablespace. I do not recommend that. Apex should have its own tablespace.

select username, default_tablespace, temporary_tablespace, profile, oracle_maintained
from dba_users
where regexp_like(username,'^(APEX_|ORDS_)');

This shows only the default setting. We can reuse the same tablespace. But it is also possible to install apex 5.1 into a new tablespace. If you want to do that, then this new tablespace needs to be created first.

Sometimes we want to see if the data is really in this default tablespace. Here is a select that will show the data distribution and also how much space is used.

select owner as schema, tablespace_name as data_tbs, nvl(segment_type,' - total -') segment_type, round(sum(bytes)/1024/1024,2) size_in_MB
from dba_extents
where regexp_like(owner,'^(APEX_|ORDS_)')
group by owner, tablespace_name, rollup(segment_type)
;

Example result

SCHEMA        DATA_TBS SEGMENT_TYPE SIZE_IN_MB
APEX_050000   APEX     INDEX        239,69
APEX_050000   APEX     TABLE        267,19
APEX_050000   APEX     LOBINDEX     12,75
APEX_050000   APEX     LOBSEGMENT   240,31
APEX_050000   APEX     - total -    759,94
ORDS_METADATA ORDS     INDEX        4,5
ORDS_METADATA ORDS     TABLE        1,63
ORDS_METADATA ORDS     LOBINDEX     0,19
ORDS_METADATA ORDS     LOBSEGMENT   0,38
ORDS_METADATA ORDS     - total -    6,69

This is a example of one of my apex environments. As you can see there is only one Apex tablespace “APEX” used. Approximatly the same amount of data is in tables, in indexes and in LOBs. LOBSEGMENT indicates that there had been some wwv_flow_files activities going on.

Run the scripts

The scripts are located in the apex subfolder. For example D:/product/apex/apex_5.1/apex.

Navigate to that folder and start an sqlplus session with sys as sysdba. If you are in a CDB/PDB environment connect to the PDB not to CDB$ROOT. To connect to the PDB, the service name needs to be provided. Because of that also a running listener and a matching tnsnames.ora file is needed.

Assuming the following settings:

  • tablespace for apex and apex files: APEX
  • temp tablespace: TEMP
  • image directory: /i/

Then those 3 scripts need to run.

@apexins1.sql APEX APEX TEMP /i/
@apexins2.sql APEX APEX TEMP /i/

stop ORDS

@apexins3.sql APEX APEX TEMP /i/

restart ORDS

Phase 4 is automatically started by running a dbms_scheduler job.

Check privs and synonyms

Sometimes we give extra access from the Apex Schema to our own custom schema. For example in one Application I extended the Apex Feedback functionality and did use the view APEX_TEAM_FEEDBACK. Such changes need to be moved to the new APEX_050100 schema.

ACLs

Here is just how to check if the Apex 5.0 schema has any network ACLs set.

SELECT *
FROM DBA_HOST_ACES xe
where principal = 'APEX_050000';

I created a script to duplicate all ACEs that exists for APEX_050000 to APEX_050100.

The script is shown and explained in a separate blog post.


Grants

Here is just how to check if the Apex 5.0 schema has any objects granted to other schemas.


select *
from all_tab_privs
where grantor like 'APEX\_%' escape '\'
and grantee not in ('PUBLIC','SYS','SYSTEM');

It will show objects like tables, views and packages that have privileges granted directly.

To see only the missing grants you can run the following statement. If it returns no rows, then you are fine.


select GRANTEE , TABLE_SCHEMA , TABLE_NAME , PRIVILEGE , GRANTABLE ,HIERARCHY
from all_tab_privs
where grantor in ('APEX_050000','APEX_050100')
and not regexp_like (grantee,'^(APEX_|ORDS_|SYSTEM$|PUBLIC$|SYS$)')
group by GRANTEE , TABLE_SCHEMA , TABLE_NAME , PRIVILEGE , GRANTABLE ,HIERARCHY
having count(*) = 1 and min(grantor) = 'APEX_050000';

Those grants probably need to be copied to the new apex_50100 schema.

Search Source code

You should search the complete application, if there are any references to APEX_050000. This should be done after the migration.

downgrade to 5.0

The section how to downgrade an application back to 5.0 is currently missing from the documentation. Here is a official blog post how to do it: http://jastraub.blogspot.de/2017/01/ooops-i-did-it-again.html

This is the sql script that Jason Straub published to do the downgrade:

alter session set current_schema = SYS;

@wwv_flow_val.sql
@wwv_flow_val.plb 

begin
 dbms_utility.compile_schema('APEX_050000');
end;
/ 

set define '^'
@validate_apex x x APEX_050000

begin
 for i in ( select owner, trigger_name
 from sys.dba_triggers
 where owner = 'APEX_050000'
 and trigger_name like 'WWV_FLOW_UPGRADE_%'
 order by 1 )
 loop
 sys.dbms_output.put_line('Dropping trigger '||i.owner||'.'||i.trigger_name);
 execute immediate 'drop trigger '||i.owner||'.'||i.trigger_name;
 end loop;
end;
/

ALTER SESSION SET CURRENT_SCHEMA = APEX_050000;
exec apex_050000.wwv_flow_upgrade.switch_schemas('APEX_050100','APEX_050000');

ALTER SESSION SET CURRENT_SCHEMA = SYS;
drop context sys.APEX$SESSION;
create context sys.APEX$SESSION using APEX_050000.WWV_FLOW_SESSION_CONTEXT;
declare
 l_apex_version varchar2(30);
begin
 l_apex_version := apex_050000.wwv_flows_release;
 dbms_registry.downgrading('APEX','Oracle Application Express','validate_apex','APEX_050000');
 dbms_registry.downgraded('APEX',l_apex_version);
 validate_apex;
end;
/

select * from dba_tablespaces ;

select username, default_tablespace, temporary_tablespace, profile, oracle_maintained
from dba_users
where regexp_like(username,'^(APEX_|ORDS_)');

select owner as schema, tablespace_name as data_tablespace, nvl(segment_type,' - total -') segment_type, round(sum(bytes)/1024/1024,2) size_in_MB
from dba_extents
where regexp_like(owner,'^(APEX_|ORDS_)')
group by owner, tablespace_name, rollup(segment_type)
;

copy ACLs during Upgrade to Apex 5.1

The following works in 12c only. In previous database versions the package to set ACLs had other modules. Those are now deprecated. The script does not call any deprecated functions.

You can see the ACLs/ACEs by checking the data dictionary.

select * from DBA_HOST_ACES where principal like 'APEX_%';

This little script will check the network ACLs for the APEX5.0 schema and copies it to the Apex 5.1 scheme. It will not delete any ACLs. But use it at your own risk. It automatically commits.


declare
/* Author: Sven Weller
Company: syntegris information solutions GmbH
Purpose: Transfer Network ACLs from APEX_050000 to APEX_050100 schema
Created: 11.01.2017
*/
v_source_schema  varchar2(30) := 'APEX_050000';
v_target_schema  varchar2(30) := 'APEX_050100';

v_ace xs$ace_type;
v_host DBA_HOST_ACES.host%type;
v_lower_port DBA_HOST_ACES.lower_port%type;
v_upper_port DBA_HOST_ACES.upper_port%type;

BEGIN
for apex50acls in (SELECT xe.*
,row_number() over (partition by host, principal, lower_port, upper_port, start_date, end_date, grant_type,inverted_principal, principal_type order by ace_order, privilege) privlist#
,dense_rank() over (order by host, principal, lower_port, upper_port, start_date, end_date, grant_type,inverted_principal, principal_type) group#
FROM DBA_HOST_ACES xe
where principal = v_source_schema
and (xe.host, xe.lower_port, xe.upper_port,xe.start_date, xe.end_date, xe.grant_type,xe.inverted_principal,xe.principal_type)
not in (select t.host, t.lower_port, t.upper_port, t.start_date, t.end_date, t.grant_type,t.inverted_principal, t.principal_type
from DBA_HOST_ACES t
where t.principal = v_target_schema)
order by group# ,privlist#
) loop

if apex50acls.group#>1 and apex50acls.privlist#=1 then
-- store the old acl
DBMS_NETWORK_ACL_ADMIN.APPEND_HOST_ACE(
host        => v_host,
lower_port  => v_lower_port,
upper_port  => v_upper_port,
ace         => v_ace);
end if;

if apex50acls.privlist#=1 then -- first time
-- prepare the new acl
v_ace := xs$ace_type(
privilege_list => xs$name_list(apex50acls.privilege),
principal_name => v_target_schema,
principal_type => case apex50acls.principal_type
when 'APPLICATION' then xs_acl.ptype_xs
when 'DATABASE' then xs_acl.ptype_db
when 'EXTERNAL' then xs_acl.ptype_external
end ,
granted   => apex50acls.grant_type = 'GRANT',
inverted  => apex50acls.inverted_principal = 'YES',
start_date => case when apex50acls.start_date < systimestamp then systimestamp
when apex50acls.start_date > systimestamp then apex50acls.start_date
end,
end_date => apex50acls.end_date
);
v_host:= apex50acls.host;
v_lower_port := apex50acls.lower_port;
v_upper_port := apex50acls.upper_port;
else
-- add a new privilege
v_ace.privilege_list.extend;
v_ace.privilege_list(apex50acls.privlist#):= apex50acls.privilege;
end if;

end loop;
if v_host is not null then
-- store final ace
DBMS_NETWORK_ACL_ADMIN.APPEND_HOST_ACE(
host        => v_host,
lower_port  => v_lower_port,
upper_port  => v_upper_port,
ace         => v_ace);
end if;
END;
/


Align topbar divs horizontally in Apex 5 UT

Using the 12 column grid in Apex 5, we can easily position regions (=divs) as we want.

Unfortunately this is not possible in the title bar where the breadcrumbs reside. There simply is no column grid in the breadcrumb bar. But sometimes it is useful to add some regions or DIVs there.

Here is an example how two regions look that are added to the breadcrumb bar.

topbar_position_vertical
default vertical alignment

They are always aligned one below the other. To use the space available we often want to stack the divs beside each other.

A tiny little bit of css can change this alignment. Add this on page level to the css section.

.syn-app--topbarcontainer, div#R_TOPBAR {
  border-spacing: 2px 2px;
  border: 0px solid;
  display: -webkit-flex;
  display: -ms-flexbox;
  display: flex;
  flex-direction: row;
};

The main trick here is to use a flex display with direction row. This will try to align all child divs in a horizontal row.

More infos about flex property: http://www.w3schools.com/cssref/css3_pr_flex-direction.asp

The css class “syn-app–topbarcontainer” then needs to be applied to a parent region. This region should have the “Blank with Attributes” template (Apex 5.1).

Alternatively the region can use R_TOPBAR as a region alias.

The two Regions A and B are subregions. The subregions can be used with any template. The example uses the standard template with some minified settings.
 

topbar_position_PD02
region settings

And this is how it looks in the application:

topbar_position_horizontal
horizontal alignment

This works in Apex 5.0 and also in Apex 5.1 (early adopter).

Be aware that this is not a responsive layout. So when the browser window size is lessened, then the regions will not position below each other.